This week's technique of the week is tassels. It wasn't what I originally planned to write about but with current happenings, it seems to fit quite well. As you may have seen in my previous posts, its graduation time and yesterday it was my turn to stop being a graduand (my new word!) and become a graduate. I made a few cards for some close friends of mine who were graduating with me, which is where today's technique comes from. The tassels made would then form part of a cap embellishment to go on the front of the cards. I originally found a tutorial through Pinterest (where else!), but having used it as a starting point, I chose to make my own.
Tassels are really straightforward to make but can be fiddly depending on the size of the tassel and the length of you fingernails! (Shorted makes life so much easier I found out). All you need to make a tassel is:
- Some thread/string/wool. I used black thread for mine as they were only going to be small but obviously, to make bigger tassels, you would use a thicker material.
- A piece of cardboard. My tutorial uses foam board as clever me had a clear out earlier in the week and this was all I could find. Cardboard would work better but essentially you need something that is thin and stiff. The size of the cardboard will determine the size of the tassel.
- Scissors.

 To start, cut a short length of thread and lay it across the top of the cardboard. This doesn't need to be too long but needs to be long enough so that it can be tied. The tail will also be used to attach it to the cap itself.
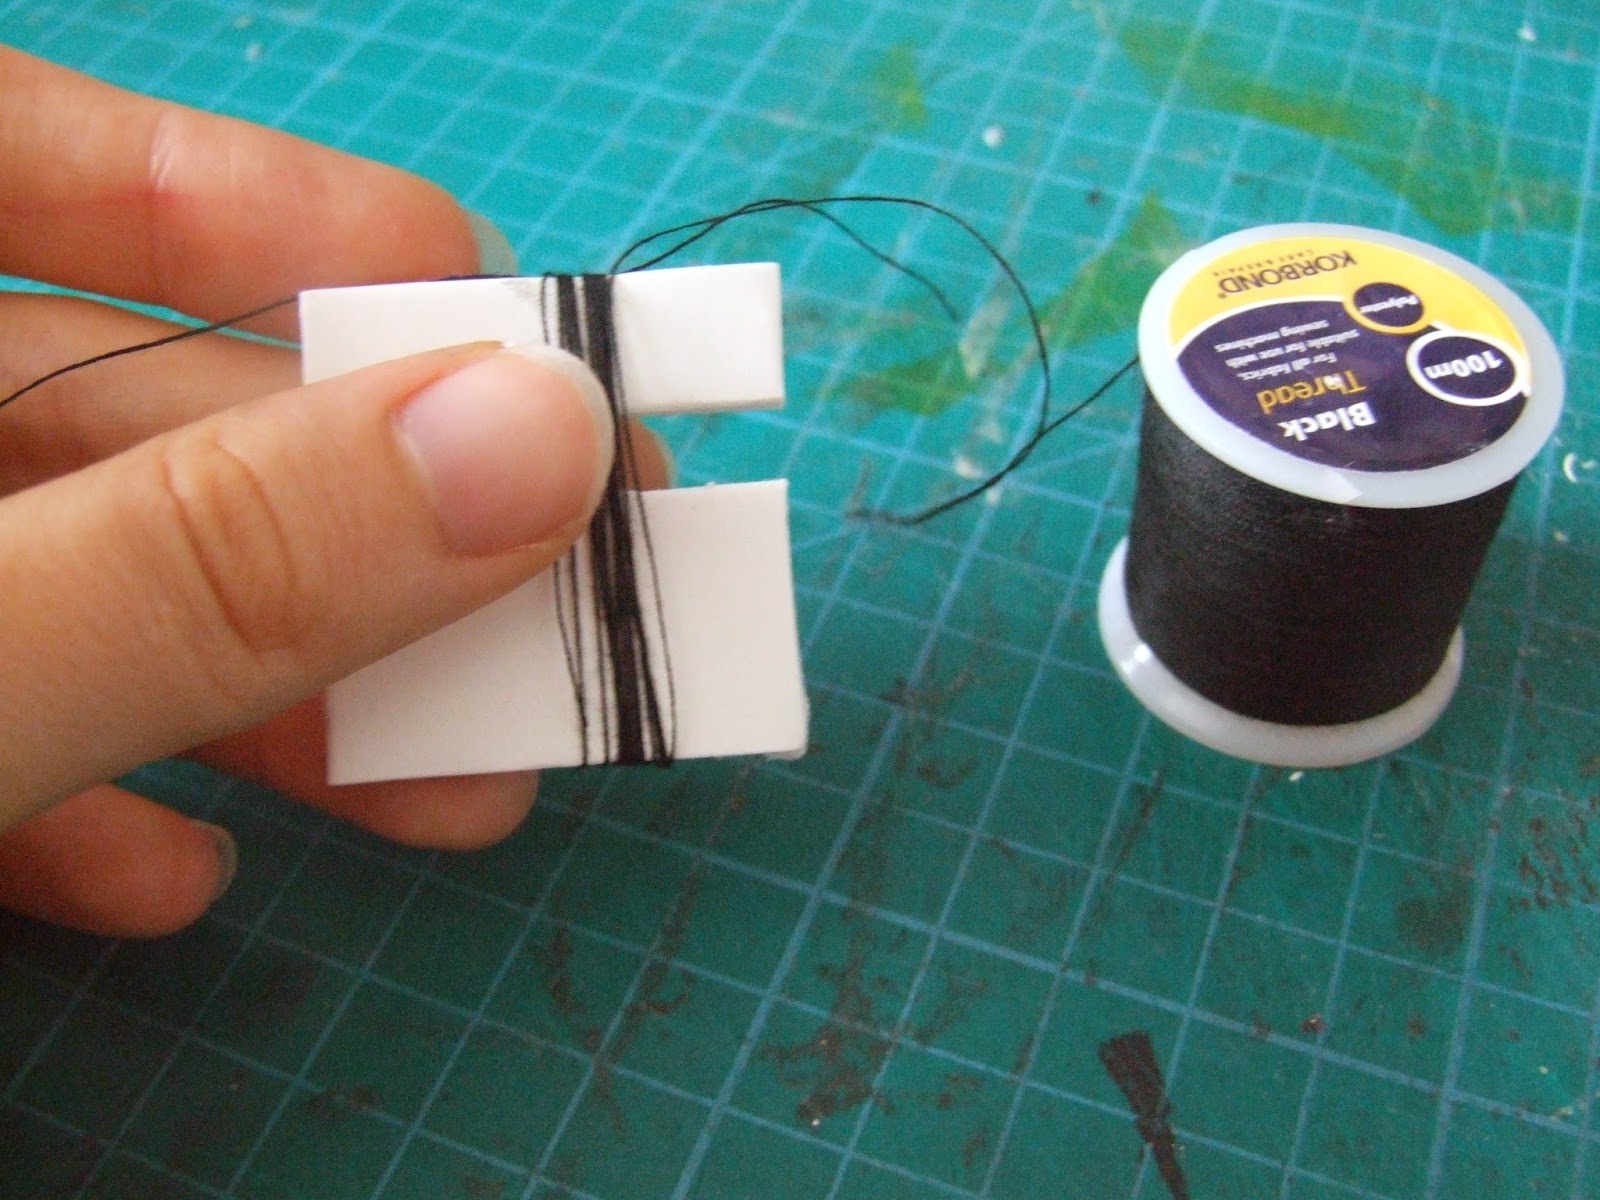
Next, its time to start winding. Starting at the bottom, wind the thread around the board, making sure that you wind over the piece of thread at the top. How many times you go around is up to you, for this one, I went around 20 times. Once you are back at the bottom, cut the thread from the spool.

That thread I mentioned in the first step? Tie it.
Try and make it as tight as possible. I double knotted it just to make sure.

 Flip the card over and cut the thread at the bottom. This makes the tassel and also lets you remove it from the card.
This is where it can get fiddly.
The next step is to tie the middle so that it actually resembles a tassel. To do this, wrap some more thread around and knot it. I try to wrap it a couple of times before tying the knot. It can be messy when you are wrapping but once it's knotted, it's easy enough to neaten and arrange. The ends can then become part of the tassel as well once trimmed.


 When attaching it to a black card cap, I threaded the tail through a needle and poked it through the centre of the cap, securing it with a bit of cello-tape and trimming the ends.
 Three tassels made three caps for three cards. I chose to use my school colours as we are part of two universities. I didn't want to make three identical cards which also let me try out different ways to place the cap.
Having the owl throw it up in celebration was a very simple way to us it: the tassel doesn't need arranging or sticking down.
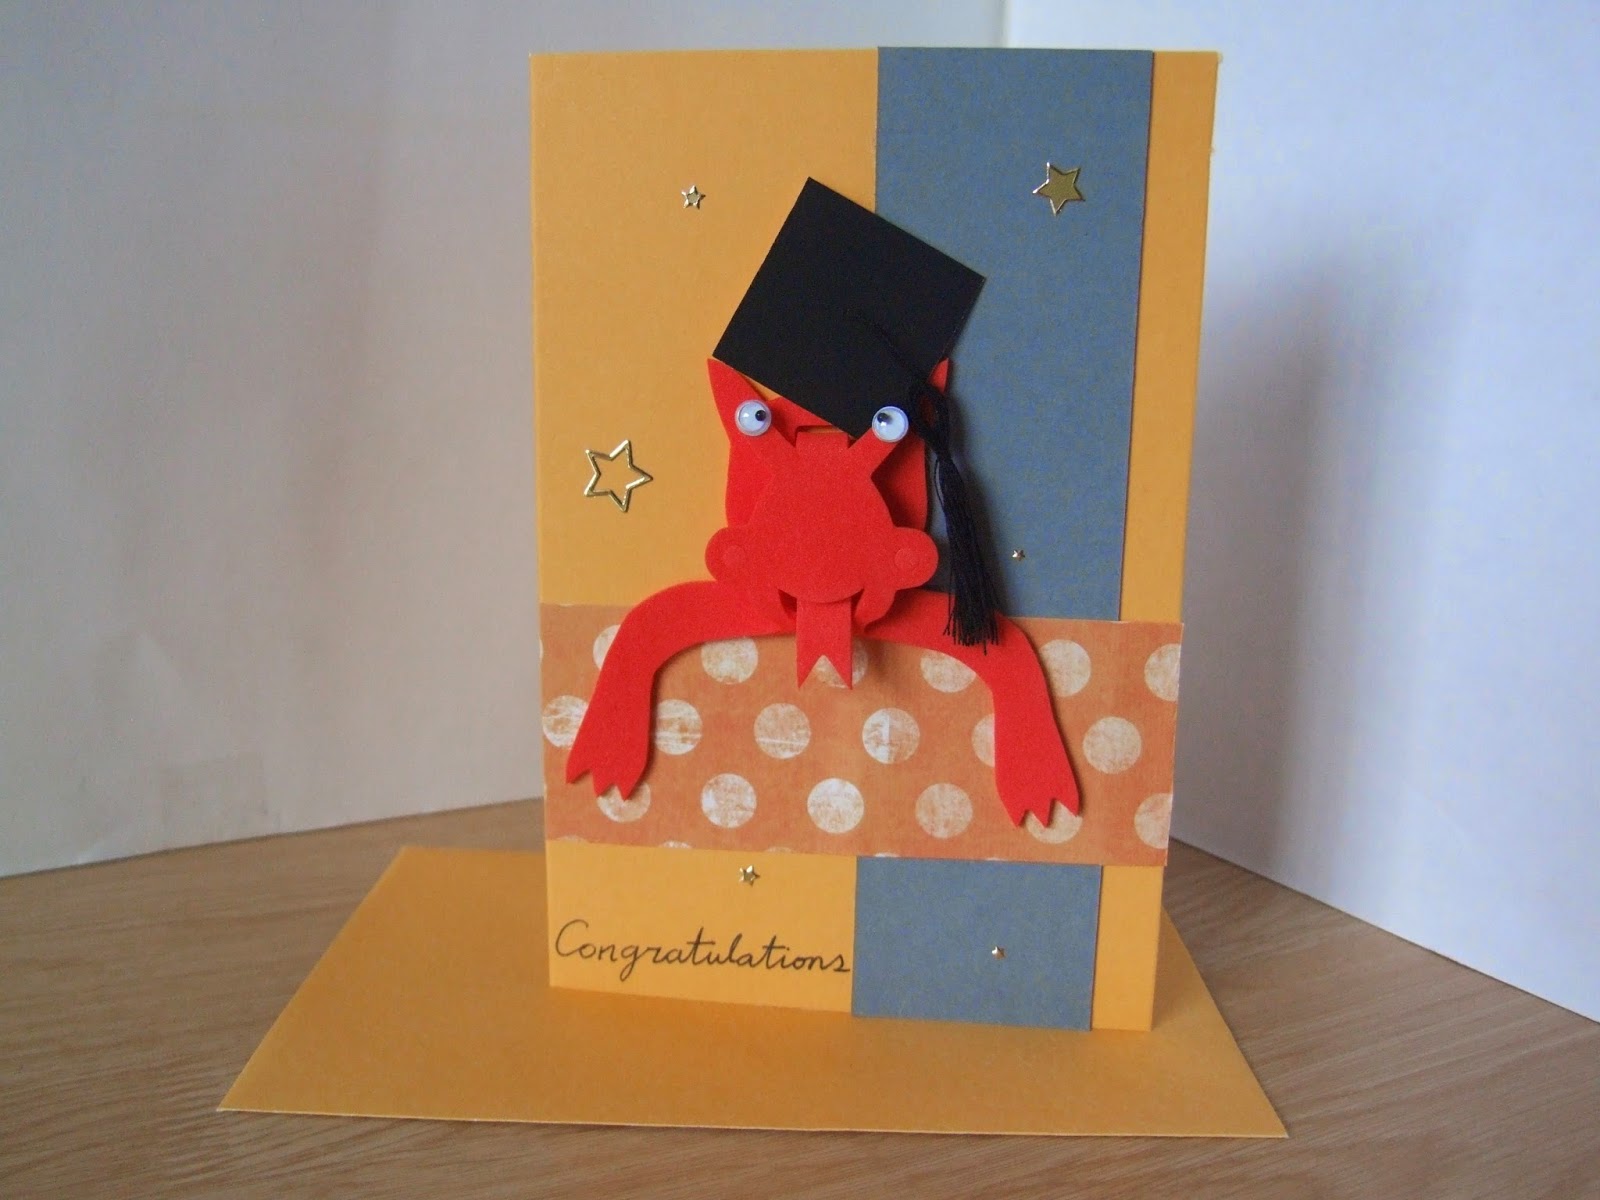
The second card was for a fellow Welshman, and having found this foam dragon in my stash, it was just crying out to be used. I should have however, trimmed the cap down to compensate for the foreshortening (see the third card). The other thing to remember when actually putting the cap onto a figure is to stick the tassel down - otherwise it'll get in the way! Although it would kind of fit in with this goofy looking dragon.

The third card is probably the most traditional of the three. I added a bit of glue to keep the tassel off to the side. This card was also embellished with a degree scroll. This was simply made by rolling a bit of white paper around the end of a paint brush, using glue to seal the end of the strip. To finished I used a bit of red thread to tie a bow around it and flattened the scroll slightly so that it adhered to the card front easily.
No comments:
Post a Comment
Thanks for your comment. It's greatly appreciated and I hope you carry on reading =)